
How to make App Store screenshots
From raw simulator captures to a ZIP you can drag straight into App Store Connect, in six steps.
You’ll need: your app running in the simulator or on a device, and about 30 minutes. Everything below works with the free Store Screenshot Studio editor, but the advice applies whatever tool you use.
1. Plan your story
Before you take a single screenshot, write down the 4–6 things that make your app worth installing. Phrase them as benefits (“Never miss a habit”) rather than features (“Push notifications”).
Order them by importance. In App Store search results people usually see only the first three screenshots, so those have to carry the whole pitch on their own.
2. Capture clean screenshots
- Use the largest iPhone simulator so the captures stay sharp at every export size. In the simulator, ⌘ S saves a full-resolution screenshot to your desktop.
- Fill the app with realistic data. Real-looking names, numbers and photos. Empty states and “Lorem ipsum” look unfinished.
- Tidy the status bar. Full battery, full signal and a neat time. You can set this with
xcrun simctl status_bar booted override --time 9:41 --batteryLevel 100. - One capture per benefit from your plan, in the same order.
3. Write short headlines
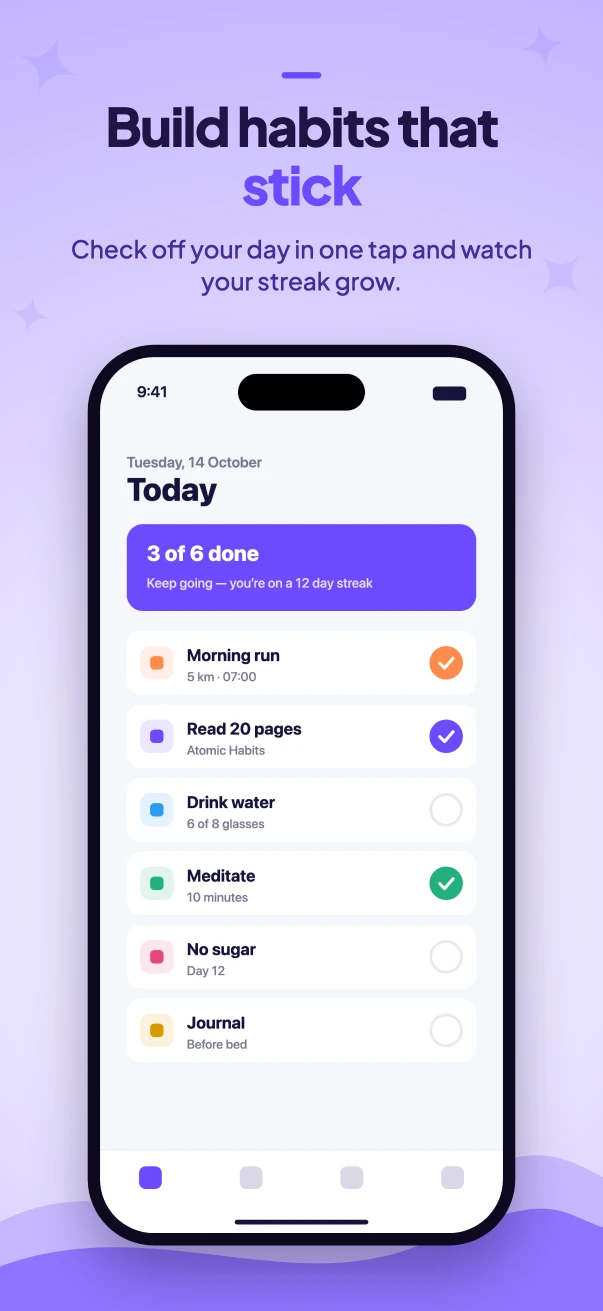
Each screenshot gets one headline of 3–6 words that states the benefit. Highlight the single most important word in your accent colour so it stands out when people scroll quickly. Read more in the best practices guide.
4. Frame and style them
Put each capture in a device frame on a background, with the headline above it. Keep everything consistent across the set: the same background style, font, colours and device position. Consistency is what makes a set of screenshots look professional rather than assembled.
In Store Screenshot Studio you pick a theme, font, background pattern and frame once, and every slide follows it. Add your app icon so the feature graphic matches too.
5. Export every required size
App Store Connect only accepts exact pixel sizes per device slot. At minimum you need the iPhone iPhone 6.3" size (1206 × 2622), and most apps also upload iPhone 6.9" (1320 × 2868). See the full list in the App Store screenshot sizes guide.
Export PNGs or JPEGs in RGB without transparency. Images with an alpha channel can be rejected. Store Screenshot Studio exports 24-bit RGB PNGs at every size in one ZIP, with folders named after the App Store Connect slots.
6. Upload to App Store Connect
- Open your app in App Store Connect and select the version you’re preparing.
- Scroll to Previews and Screenshots and pick the device size tab.
- Drag in the files from the matching folder of your ZIP. They’re numbered, so they land in order.
- Repeat for each device size and language, then save.
Building for Android too? The same project exports Google Play phone screenshots and the feature graphic.
FAQ
Can I just upload raw screenshots from my phone?
Yes, Apple accepts plain captures at the right size. But framed screenshots with headlines explain your app far better at a glance, and most top apps use them.
What tool should I use to make App Store screenshots?
Design tools like Figma work but take time to set up for every size. A dedicated generator such as Store Screenshot Studio does the framing, text and resizing for you, for free and in the browser.
Do I need a Mac to make App Store screenshots?
You need a Mac to run the iOS simulator, but you can also take captures on a real iPhone. Framing and exporting can be done on any computer.
How long does it take?
Once you have your captures, about 15–30 minutes to write headlines, style the slides and export.
Related guides
App Store screenshot sizes
Every iPhone and iPad size App Store Connect accepts, plus upload rules.
Google Play screenshot sizes
Phone and tablet screenshot sizes, limits and the rules Play Console enforces.
Google Play feature graphic size
The required 1024 × 500 banner: specs, safe zones and design tips.
Try it with the example project
Open the editor and load the example to see a finished set of screenshots, then swap in your own.
Open the editor — it’s free